Wednesday, May 29, 2013

Cotton Candy Triangles

Hello!

I've been majorly lacking inspiration lately, but after seeing reddit users' shmarpants and nixonstarr posts, I got the inspiration I have been looking for for the past few weeks. For some reason, I still can not properly grasp the concept of gradients, even though they are supposed to be the simplest nail art technique. But anyway, here is my rendition of their mani's.


Here is what I used:


Alpine Snow - OPI
Turquoise & Caicos - Essie
Bandeau - Urban Outfitters
Boom Boom - Sinful Colors
Up and Kim-ing Pink - Nicole by OPI
White striping polish
Scotch tape
Cosmetic sponge


X


Sunday, May 19, 2013

Turquoise Gradient Dotticure

Hello!

Now that it's summer vacation (except for one final paper), I hope to  be posting a lot more on here. It's sort of embarrassing that I have had this blog since December, and only have eight posts even though I do my nails weekly. Anyway, this week I did a a turquoise gradient dotticure inspired by reddit user sexytimespanda. It's super simple to do and looks super cool. Check it out:


Here is what I used:


Alpine Snow - OPI
Smush - Urban Outfitters
Turquoise & Caicos - Essie
Hannah (from the GIRLS collection) - Deborah Lipmann
Dotting Tool


In case you're wondering why there are only 3 colors posted in the pic above, but 4 colors seen here, I ended up mixing 'Hannah' with 'Turquoise & Caicos' to make a nice in between shade. I also mixed 'Smush' with 'Alpine Snow', as it ended up looking too similar to 'Turquoise and Caicos' once on my nail.


Bonus: They match my iPhone :3


X


Saturday, April 20, 2013

Color Block/Mosaic Nails and Tutorial

Sorry for not posting for so long. I was at Coachella last weekend, and school and work have been taking up all the rest of my time. I finally had some free time, so I decided to do these mosaic/color block nails; partly because I was in the mood to torture myself a little bit, and also because I realized that I had so many beautiful colors that I had never used. Fair warning: these require a lot of patience (took me almost 2 hours), and some practice with striping tape. Here's what I used:


"Alpine Snow" - OPI
"Butler, Please" - Essie
"Shoshanna" - Deborah Lippmann (from the GIRLS collection)
"Baby Blue" - Nicole by OPI
Striping tape


1. Paint your nail your base coat. This will be the color of the lines between the color blocks. 


2. Apply your striping tape in your desired position. 


3. "Color" in between the lines. This is probably the hardest part. You want to apply enough polish that it provides full coverage, but you also don't want it to run once you take off the tape. Remove the tape as soon as you finish applying the polish. You do not want the polish to dry before you remove the tape. 


4. Done! Just clean up any messy edges with a thin brush and acetone, and apply a quick drying top coat.


Hope you enjoyed!

X


Sunday, March 3, 2013

Glittery Feathers (with video tutorial!)

Hello! Sorry for not posting for so long. I rarely get on my computer lately, so it takes a lot of effort for me to get on here and post stuff (yes, I am beyond lazy). Anyway, today I'll be showing you guys a mani I did a few days ago, which was inspired by a random picture I saw on Instagram. These pictures were taken a few days after these were done, so please excuse the tip wear. Here is what I used:

Samoan Sands - OPI
Black Stripe Rite
Silver Glitter Art Club (by Color Club)


EDIT: Some people on Google Plus were asking for a tutorial, so I made my first video tutorial ever! I was wearing 3 coats of Samoan Sands at the start of the video. I hope you find it helpful.


Monday, February 4, 2013

Ikat Nails Tutorial


Today I'll be showing you guys how to do the ever-so-popular Ikat design on your nails. You have probably seen this pattern many times, on everything from clothes and accessories, to furniture and home decor. The best part about this manicure is that you don't need to be perfect about it, at all. It looks pretty complicated, but it's actually super easy. Here's what I used for this mani:
Secret Periwinkle - China Glaze
White Creme - Wet n Wild
Up and Kim-ing Pink - Nicole by OPI
Black striping polish
Seche Vite
1. Paint your nail with your base color. 

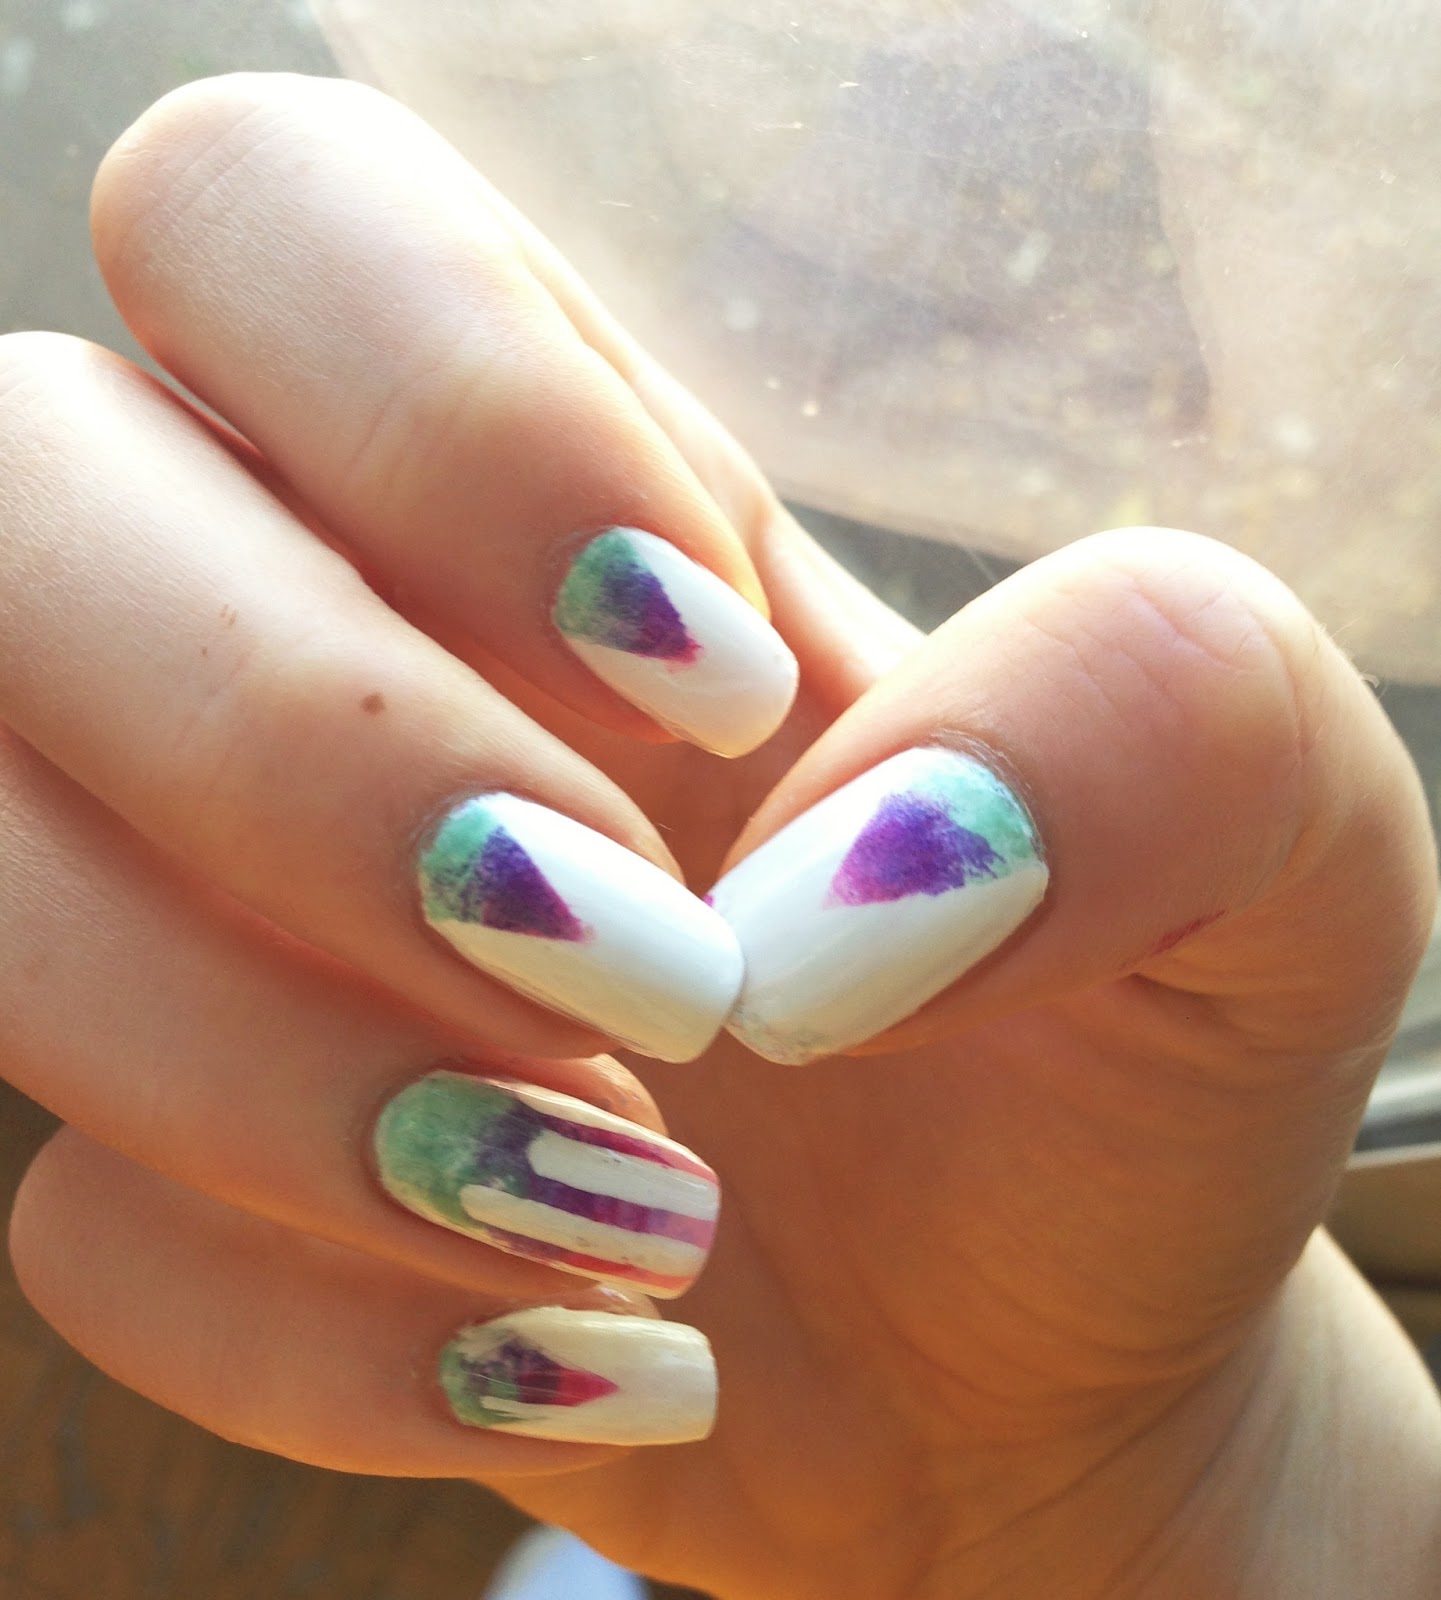
2. Paint vaguely triangular shapes with your white polish. The best part about this is that there's really no way to mess up (tip: take all excess polish off your brush before doing this).

3. Paint some pink (or whatever color) blobs in the white shapes. Once again, there's really no way to mess this up.
4. I kind of skipped a step here, but using your striping polish, make short lines outlining the white shape. You want to be able to see them sticking out. Then, use the black to make little blobs in the pink part of the shape.

5. Apply top coat and you're done (tip: make sure the top coat's brush doesn't touch the nail; it will smear the design, as you can see on my thumb).

X


Monday, January 28, 2013

The two hour manicure

Last night I decided I was going to do a simple manicure for the school week, and save the fancy stuff for the weekend. But of course, after painting my nails bright pink, I had the sudden itch to do full hand-placed glitter accent nails for the first time. So I did, and it took almost two hours. This is what I used:
Nail Tek II Intensive Therapy
"Up and Kim-ing Pink" from Nicole by OPI
"Make U Smile" from Nicole by OPI
Seche Vite
Dotting tool
(for the matte version) "Matte About You" from Essie


Matte-ified!


I still haven't decided if I like the matte or glossy version more. What do you think?

X


Saturday, January 26, 2013

Subtle Dot Gradient Tutorial

I've been wanting to try out dot gradients for a while, but I just hadn't found the right color combination yet. Luckily, I finally received my order of "Samoan Sands" by OPI last week, and I knew I had to finally try a dot gradient mani out! The color combination is actually inspired by a reddit post by /u/twelveeight. Anyway, here is what you'll need:


 "Samoan Sands" by OPI
"Chinchilly" by Essie
Top coat
Dotting tool ( I used the one with the largest dot)
Tape


1. Paint your nail your base color. Since "Samoan Sands" is a bit sheer, I decided to use it as the base color, so I wouldn't have to deal with painting it over the gray.

2. Use tape to create a diagonal line and paint the un-taped side with "Chinchilly" (make sure your base color is completely dry before you do this!!)
3. Use your dotting tool to create dots along the diagonal line (don't worry if the dots stick up, the top coat will even it out).
4. Make dots with the other color in between the first set of dots. Then make randomly arranged dots with the opposite colors. 
5. Apply top coat and you're done!

x